Before You Sell an SVG: A Cut File Checklist for Etsy and Marketplaces
Validate, check path counts and sizes, ship the right formats, name layers and test-cut: a pre-listing checklist that keeps cut file buyers happy.
Selling SVG files on Etsy, Creative Fabrica or your own shop means your file has to work on machines you will never see. A customer with a Cricut Joy, someone else with Silhouette Studio Basic, a third with a diode laser. When the file fails, you get the bad review, not their software. This checklist covers what to test before a listing goes live.
1. Validate every SVG
Run each SVG through a validator before anything else. It takes seconds and catches problems that look fine on screen:
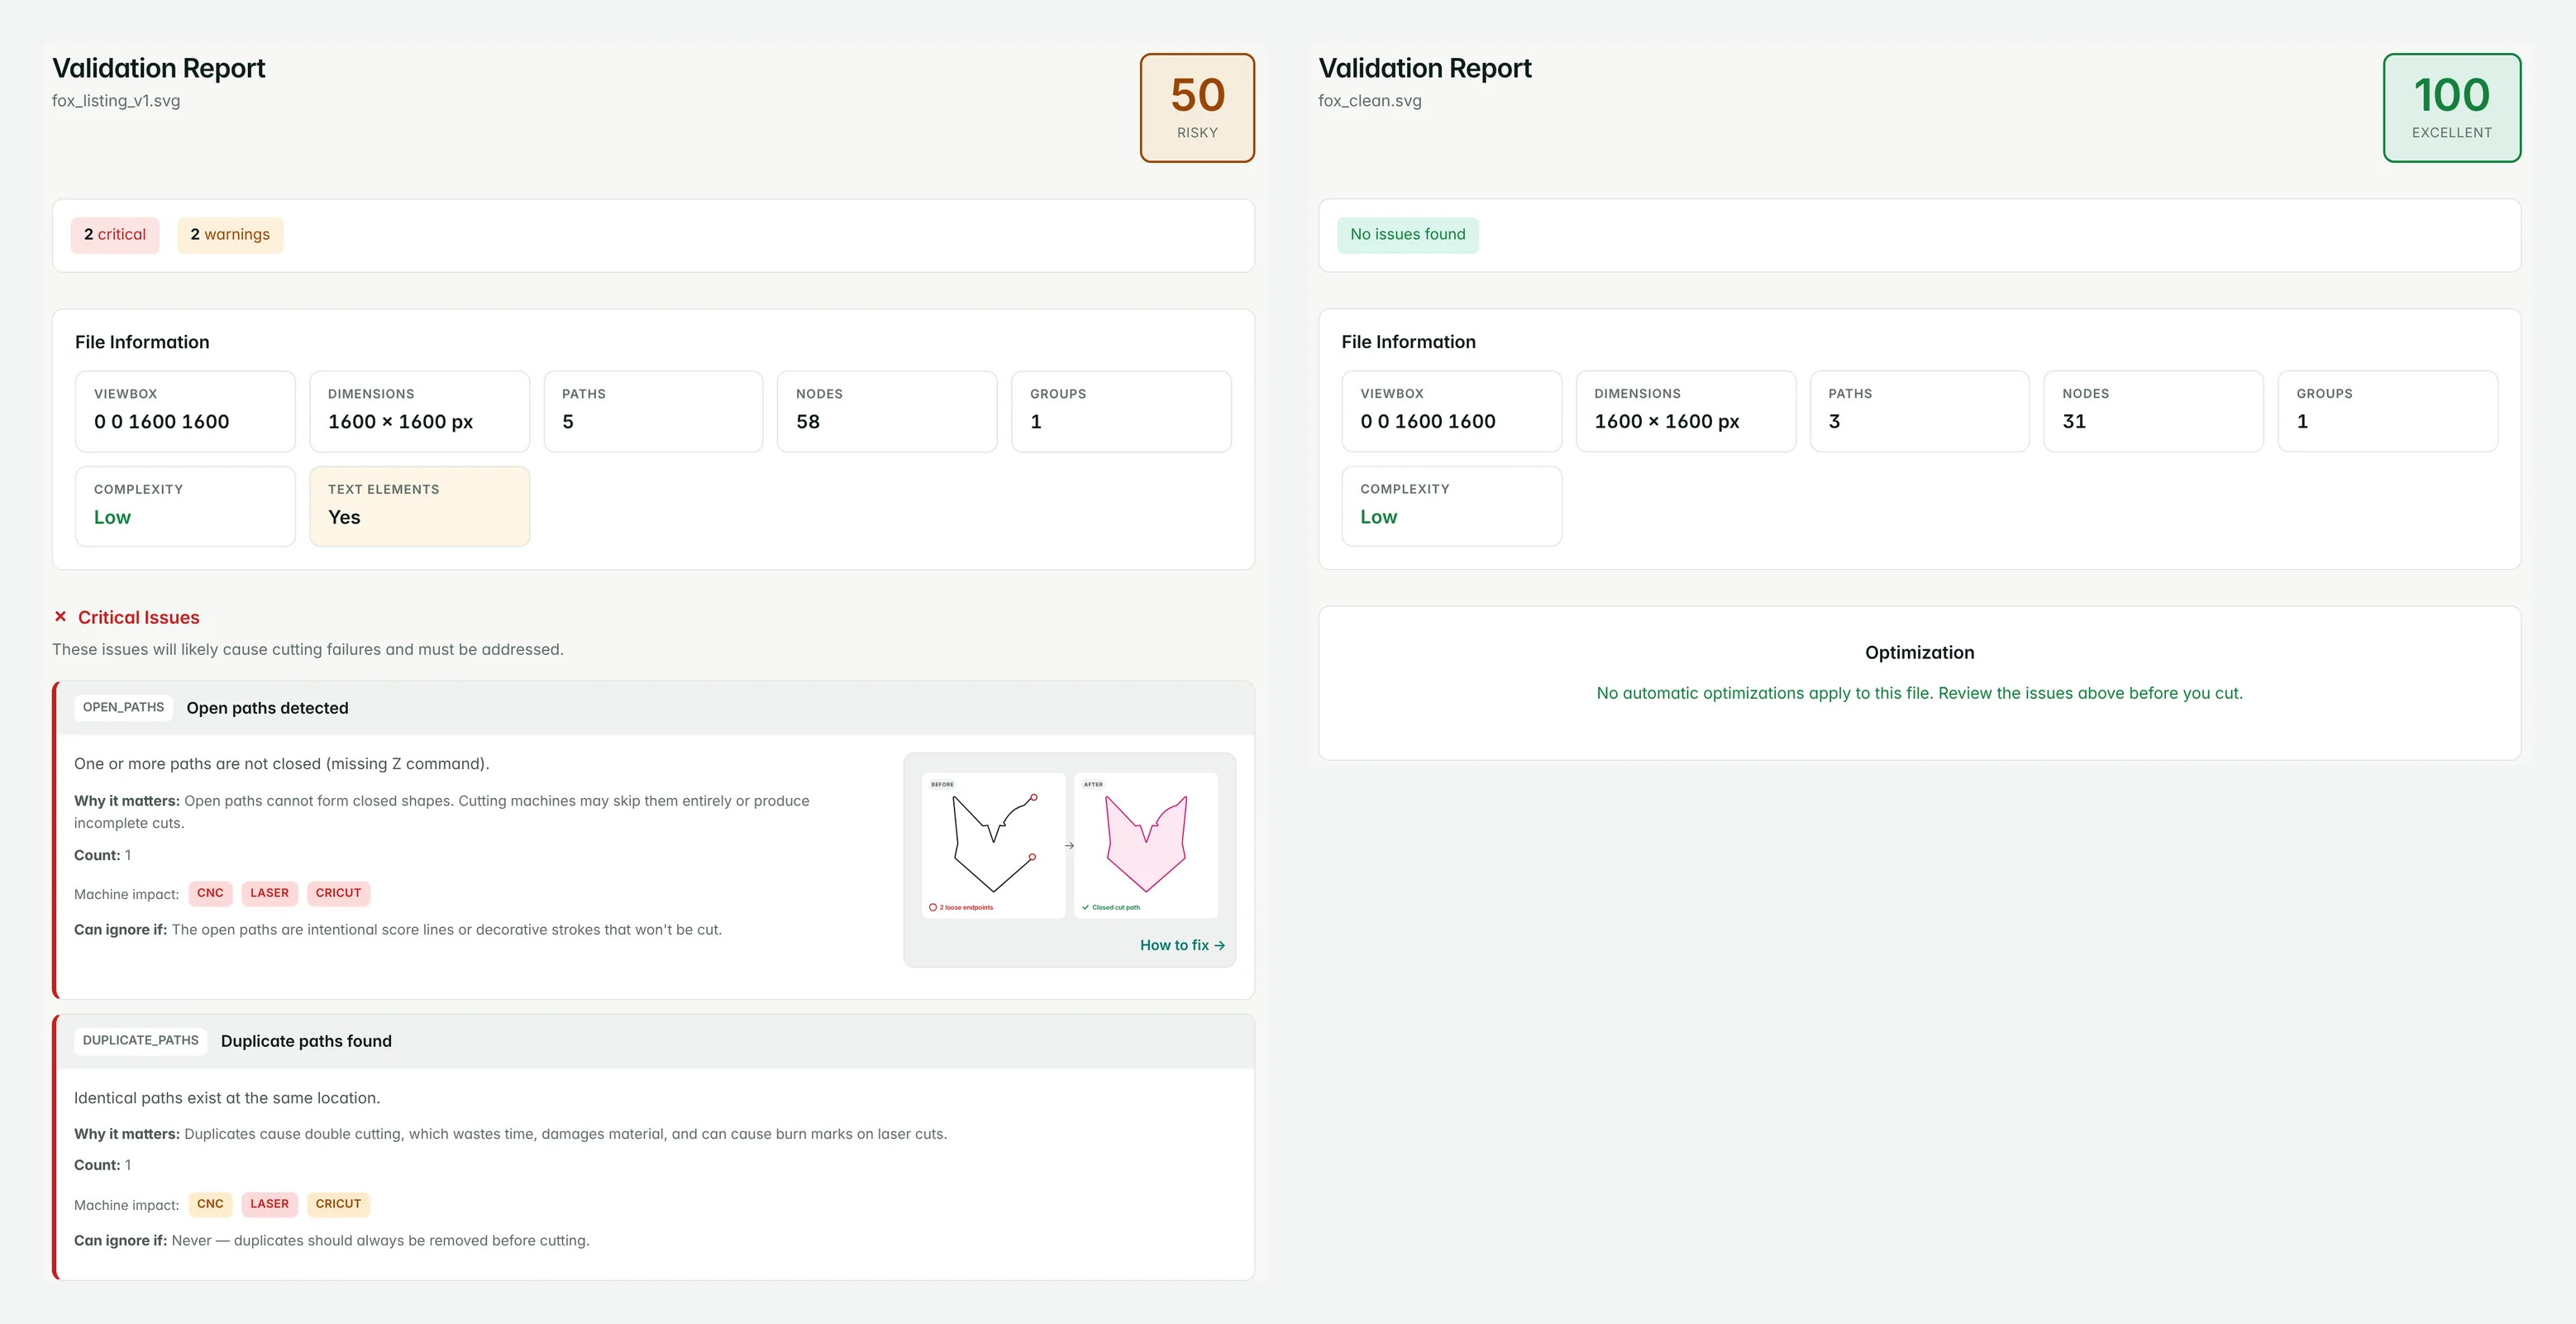
The draft on the left looks identical to the clean file on screen. The validator found:
- An open path: a decorative curve that was never closed. Cutting machines skip it or cut it as a line.
- A duplicate path: the outline copied on top of itself. The blade cuts it twice, which tears paper and leaves burn marks on wood.
- Live text: a word set in a font. On a customer's computer without that font it is replaced or dropped.
- A stroke-only shape: a line with no fill, which may be meant as a shape.
Score 50 versus 100, and the difference would only have shown up as a complaint. The validator is free and needs no account.
2. Check the boring numbers
- Path count. Cricut Design Space rejects SVGs with more than 5,000 paths. Auto-traced designs can hit that easily.
- Node count. Thousands of nodes per shape make cuts slow and jerky. See reducing SVG nodes.
- Size. Open the file in a second program and check the design comes in at the size you state in the listing. See SVG scale and units.
- Text. Convert all text to paths. LightBurn, for example, does not import embedded fonts.
3. Ship the formats your buyers need
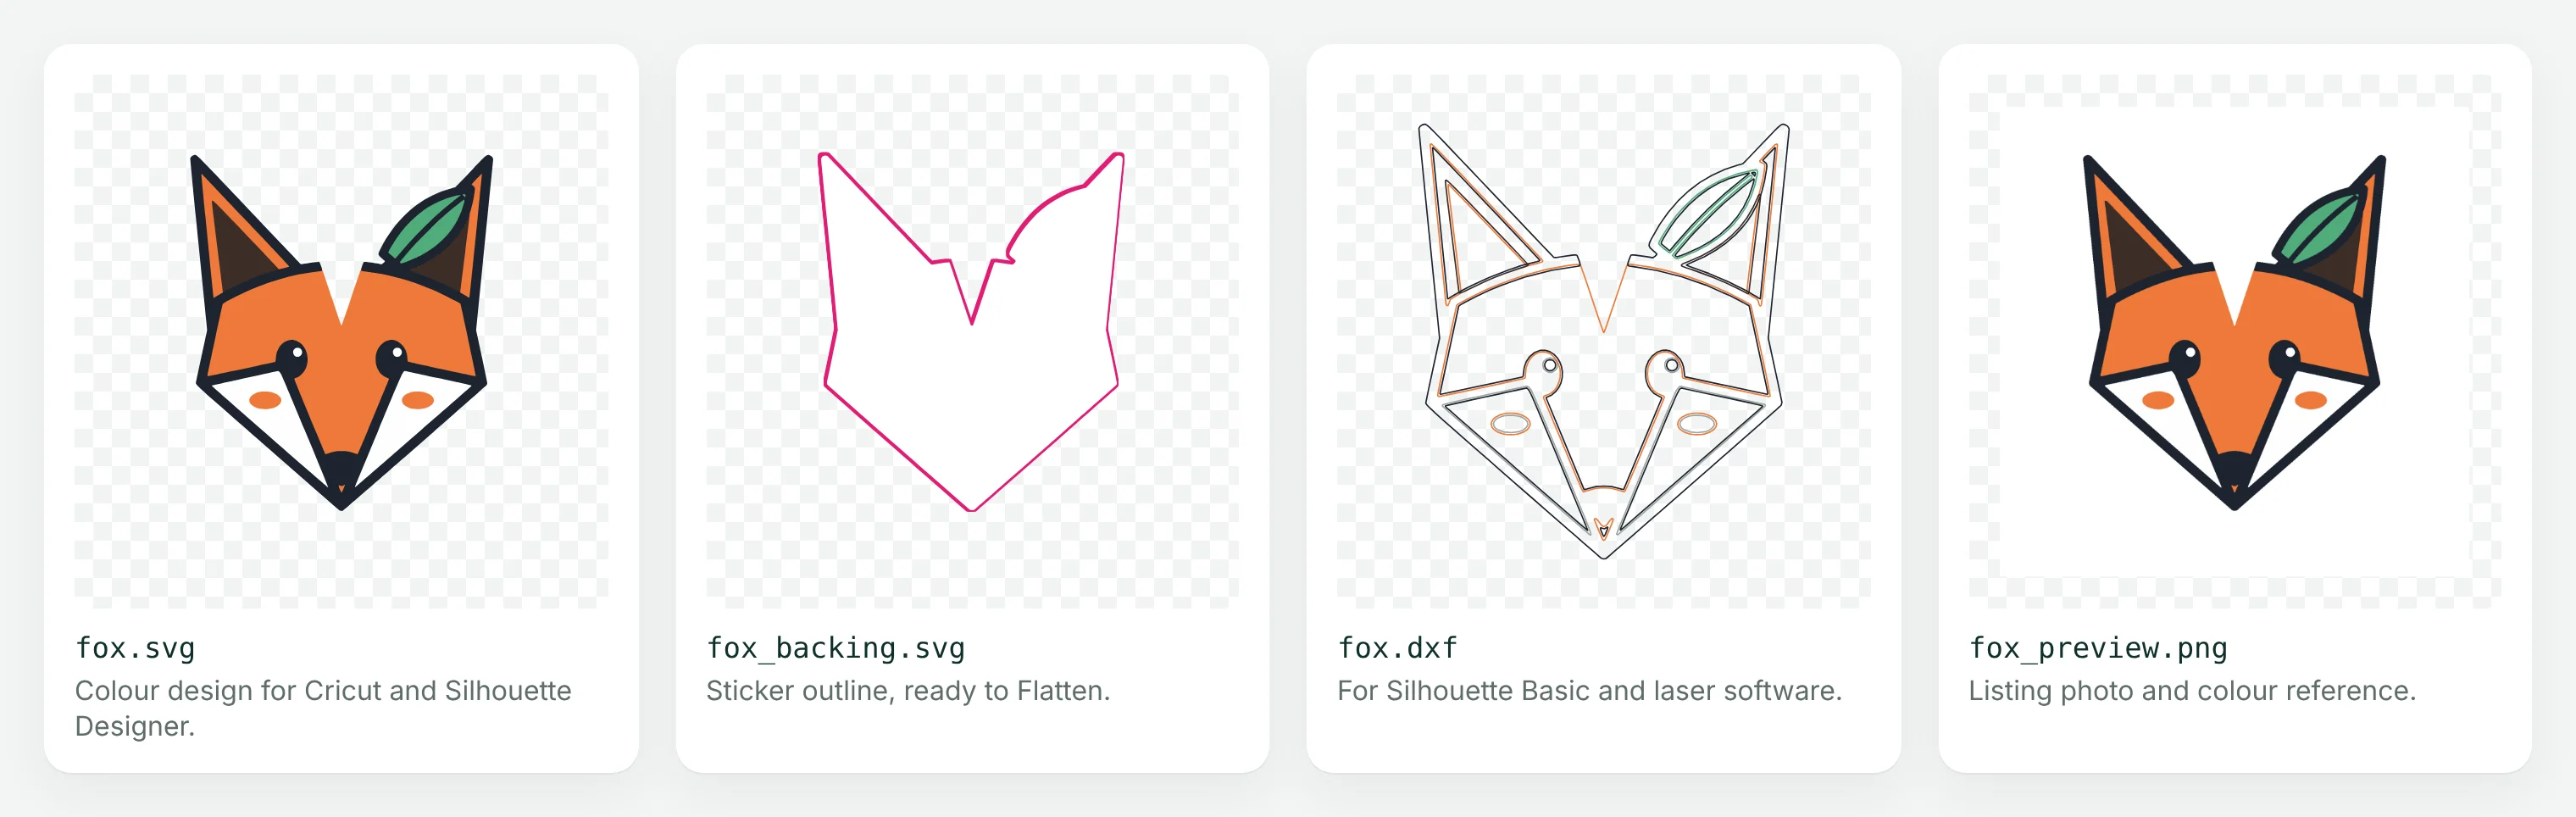
Not every buyer can open an SVG. Silhouette Studio Basic Edition opens DXF but not SVG, and Cricut's mobile apps do not open DXF. A bundle that covers everyone:
- SVG for Cricut Design Space and Silhouette Designer Edition.
- DXF for Silhouette Basic, LightBurn and CAD.
- PNG with a transparent background, for previews and Print Then Cut.
- EPS or PDF if your buyers edit in Illustrator.
For stickers, add the backing outline as its own file. More on what each format does in SVG, DXF, EPS or PDF.
4. Name layers and files like a human
- Name colour layers so a buyer knows which vinyl goes where:
01-base-teal, notpath4512. - Use the same base name for every format:
fox.svg,fox.dxf,fox.png. - Remove hidden layers, guides and leftover artboard elements.
5. Test-cut it yourself
A validator catches file errors; only a test cut catches design errors. Cut each design once on your own machine at the smallest size you advertise:
- Can every piece be weeded? Very thin details tear when weeding vinyl and can burn away on a laser.
- Do layers line up when stacked? See layered vinyl colour layers.
- Does the sticker outline sit evenly around the print? See print then cut.
Photograph the test cut. A photo of a real cut next to the mockups shows buyers the file works.
6. Write the listing for the file, not just the picture
- State the formats included and the finished size in both inches and centimetres.
- Say how many colour layers the design has.
- Say which machines and editions it is tested with.
- State the licence clearly: personal use, small commercial use, number of physical items.
The checklist
- Every SVG validated: no open paths, duplicates, live text or unintended strokes.
- Under 5,000 paths; node count reasonable; correct size in a second program.
- SVG, DXF and PNG included (EPS/PDF if useful), same base file name.
- Layers named by colour and order; no hidden leftovers.
- Test-cut at the smallest advertised size; photo taken.
- Listing states formats, size, layers, tested machines and licence.
Starting from a PNG instead of a finished SVG? The converter produces the colour SVG, cut file, backing and DXF in one job, already validated.